Thursday, December 23, 2010

M & M sticks!

This is one of the items I made for my craft fair a few weeks ago. Aren't they cute? You can buy cello bags in all kinds of sizes if you search around online. These are 1" x 8" and are the perfect size for filling with M&Ms! Filling them was a bit tricky, I had to fashion a funnel out of paper... but they turned out super cute! I then finished them off with an image punched out of a circle and two scallop punches. I used the Season of Joy stamp set.

Here's another view of the whole stick:


Wednesday, December 22, 2010

Filled with Love Promotion


December 17–January 24
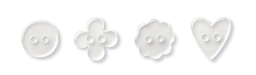
Get a FREE package of Bitty Buttons when you purchase a Filled with Love Bundle, including the Filled with Love Stamp Set and exclusive Love Patterns Designer Series Paper Pack—only available through this special promotion!

Description

Wood-Mount Item Wood-Mount Price Clear-Mount Item Clear-Mount Price

Filled with Love Bundle
Contains the Filled with Love Set* and Love Patterns Designer Series Paper Pack

124380 $32.90 124381 $26.90

Lleno de Amor Bundle
Contains the Lleno de Amor Set* and Love Patterns Designer Series Paper Pack

124382 $32.90 124383 $26.90

Plein d'amour Bundle
Contains the Plein d'amour Set* and Love Patterns Designer Series Paper Pack

124384 $32.90 124385 $26.90

Love Patterns Designer Series Paper Pack (non-bundled)
12 sheets total: three 12" x 12" sheets of two double-sided designs in Real Red and Pretty in Pink

124156 $9.95 --- ---

Here's an image of the stamp set:


And the free buttons:


Contact me to order or order from my website below.

Snowflake Magnets!


Need a quick, last-minute gift? These are super easy to make! you start with large pebbles from the floral section of any craft store. Pick out the ones that have the least flaws/cracks. Then stamp an image on white card stock that will fit under the pebble. I used the Northern Hearts hostess stamp set with some Pacific Point ink. Give your image a bit to dry. Then put a dab of crystal effects on top of your image (you don't need much, just a dime size drop or less) Then put the pebble over the crystal effects and smoosh it down. Let it dry a few hours, then cut off the excess paper and glue a magnet onto the back. These are heavy so make sure you buy strong magnets! That's it. I made mine cute by placing them in a cello bag and adding a coordinating header.

Tuesday, December 21, 2010

...Countdown to Christmas!


Sorry I haven't posted lately... I've been SO crazy getting Christmas stuff done... crafting, shopping, baking... you know how it goes, right! It will be a miracle if it all gets done in time! I do have lots of cute little holiday gifts to share with you. Here's the first...

Here's a cute little fast holiday treat! I used the Candy Wrapper die with Real red and old olive cardstock to make these cute little guys.Then You simply fill them with some candy, chocoloate of course, and add a little piece of designer paper to wrap them cute. Then I stamped the sentiment "Happy Holidays" from the sincere salutations stamp set and punched it out with the Large oval punch. Aren't they adorable? I think I'm going to bring these to christmas eve to set on everyone's plates!!

stamps:Sincere Salutations
ink:Real red, Old Olive,
paper:Real red, Old Olive, Whisper White, Designer paper
other:Candy Wrapper Die, Big Shot


Saturday, December 11, 2010

Holiday Class today!

Today is my holiday gift class! This is a favorite class of some of my customers because it helps them create some great little gifts for their friends and family. This calendar is one of the projects that they can make today. It's super cute and simple since it fits into a cd case to sit on your desk! The hardest part is deciding which images to stamp on each page!

Here are the other things we are making today:

Stamped Candle in cello bag using the Day of Gratitude stamp set!:


Flower using the XL Big shot die and Deck the Halls fabric from the holiday mini:


Stamped ornament:
using the Merry Crittermas stamp set, stamped with Staz-on ink on window sheet and rolled to fit inside the bulb!


Snowman Soup:
Decorated the mug by cutting vinyl snowflakes out with the big shot and the Northern flurries die! then added some hot chocolate, a candy cane, hershey kisses and marshmallows inside a cello bag. Add a cute tag with a punch snowman and poem.


Friday, December 10, 2010

Another Critter card

I just love these cute critters in the Merry Crittermas stamp set. For this card I used the raccoons. I stamped them with black on white and colored them using markers. Then I framed them with some chocolate chip card stock and layered them on top of a piece of red cardstock embossed using the Petals-a-plenty embossing folder in my big shot. This card was very simple to make... the hardest part was coloring the little critters!

stamps:Merry crittermas
ink:black, markers
paper:wild wasabi, real red, whisper white, chocolate chip
other: Scallop trim border punch, Petals-a-plenty embossing folder


Thursday, December 9, 2010

Window holiday card!

If you haven't tried the Movers & Shapers Big shot die, you should definitely check it out!. This set of dies let's you create a window anywhere in the front of your card. For this card I made the window in the lower left corner and stamped the squirrel from the Merry Crittermas stamp set to peek through it! Isn't he cute? I also used a piece of paper from the Candy Cane Christmas paper pack. Can you tell it has glitter on the stripes? It's really sparkly!

stamps: Heard from the Heart, Merry Crittermas
ink: real red
paper: Candy Cane Christmas Designer paper, real red, whisper white
other: Movers & Shapers Big shot die, 5/8" satin ribbon(red), curly label punch

LinkWithin

Related Posts with Thumbnails